


Выберите, пожалуйста, ник на Пикабу
Справился я с условным апгрейдом моноблока Acer Z5771. Спасибо всем, кто помогал в комментах в предыдущем посте:
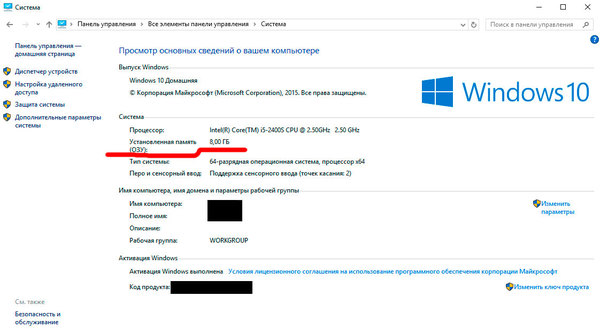
Да, расширение оперативки — условный апгрейд, но всегда приятно делать что-то своими руками. Оперативка от Кингстон встала как родная (вместо NANYA). Как и советовали, на расширение до 16 не рискнул, да и оперативную память, как сказали в магазине — нельзя вернуть, так как «технически сложный товар бла бла бла». Ну и чтобы не остаться в минусах, решил довольствоваться малым, расширился с 4 до 8. Фотошоп и большие файлы теперь нормально тянет, ура! Цена вопроса запчасти — 2600 руб. Работа — бесплатно 🙂
Пруф на память 🙂
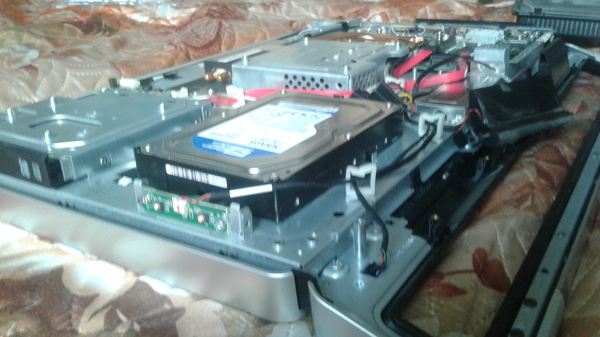
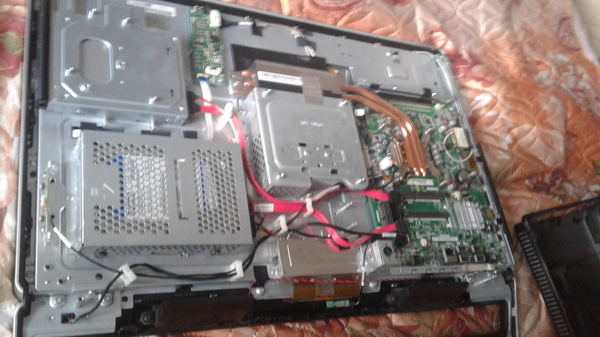
Ну и чтобы пост не был совсем скучным, ниже прилагаю для любознательных «подкапотное» фото моноблока Асер. Может, кому пригодится в будущем. В дальнейшем планирую поставить два жёстких диска руками сервисменов. Правда, места маловато, видимо, как сказали эксперты, придётся через некий оптибей вместо двд-рома ставить. СДД на 250 для ОС и прог и ХДД на терр для всего прочего (сейчас один ХДД на 500, мне хватает, но запасик никогда лишним не бывает).


Лучшие посты за сегодня
Лаборатория
The flowchart on the succeeding page gives you a graphic representation on the entire disassembly sequence and instructs you on the components that need to be removed during servicing. For example, if you want to remove the main board, you must first remove the keyboard, then disassemble the inside assembly frame in that order.
download service manual and resetter printer at http://printer1.blogspot.com


Removing the Memory
See “Removing the Battery” on page 50.
Remove the two screws securing the DIMM cover then remove the DIMM cover.
Pop out the memory.
Then remove the memory from the DIMM socket.
Machine Disassembly and Replacement
This chapter contains step-by-step procedures on how to disassemble the notebook computer for maintenance and troubleshooting.
Wrist grounding strap and conductive mat for preventing electrostatic discharge Flat-bladed screw driver
Phillips screw driver Tweezers
Plastic Flat-bladed screw driver
Hexed Screw Driver
The screws for the different components vary in size. During the disassembly process, group the screws with the corresponding components to avoid mismatch when putting back the components.

General Information
Turn off the power to the system and all peripherals.
Unplug the AC adapter and all power and signal cables from the system
Aspire 9100 series product uses mylar or tape to fasten the FFC/FPC/connectors/cable, you may need to tear the tape or mylar before you disconnect different FFC/FPC/connectors.

Removing the Optical Disc Drive Module
See “Removing the Hard Disc Drive Module” on page 50.
Remove the screw securing the optical disc drove (ODD) module.
Push the ODD module outwards with a flat headed screw driver.
Then remove the ODD module.
Disassembling the Optical Disc Drive Module
Remove two screws securing the ODD bracket.
Then remove the ODD bracket.
Removing the Hard Disc Drive Module
Remove the screw securing the hard disk drive (HDD) cover.
Then remove the HDD cover.
Pull the HDD module backwards as shown.
Remove the HDD module.
Disassembling the Hard Disc Drive Module
Remove two screw securing the HDD bracket.
Remove the other two screw on the other side.
Take out the HDD from the HDD bracket.

Removing the Battery
Unlatch the battery latch then remove the battery.

